

GitHub Copilot is powered by OpenAI Codex, which helps users to work from their editor in real time. It uses a powerful version of the GPT-3 model that is trained on a large amount of open-source code.
Furthermore, GitHub Copilot is available on different IDEs (Integrated Development Environments), including the PyCharm IDE. You can easily install it on all editions of the PyCharm and use it as an extension, which helps suggest codes for your project.
This article will teach you more about GitHub Copilot and how to enable and disable it on PyCharm.
What Is GitHub Copilot?
GitHub Copilot is an AI pair programmer that automatically provides suggestions to complete your code. It presents suggestions using an OpenAI model that is built from billions of LOC(Lines of Codes), which are open source. GitHub Copilot automatically provides suggestions to complete your code.
Furthermore, it supports every programming language in public repositories like C, C++, Python, JavaScript, etc. Regarding its pricing, the GitHub Copilot for individuals ranges from $10 monthly to $100 yearly. Moreover, the business version of GitHub Copilot is $19 per user per month.
Is GitHub Copilot Available For PyCharm?
GitHub Copilot is an extension in different IDEs like Visual Studio Code, Visual Studio, Neovim and JetBrains.
It is available with all the editions (Professional, Community and Educational) of the PyCharm IDE.

Moreover, to use GitHub Copilot in PyCharm, you must have an active subscription to Copilot.
Read on to learn about the GitHub Copilot alternatives and the similarities & differences between GitHub Copilot Vs. ChatGPT.
How To Install GitHub Copilot In PyCharm?
PyCharm should be installed properly on your device before installing GitHub Copilot. You can find PyCharm on the official page of JetBrains.
Furthermore, following the steps below, you can easily install GitHub Copilot in PyCharm.
- Open PyCharm and Click on the Plugins.
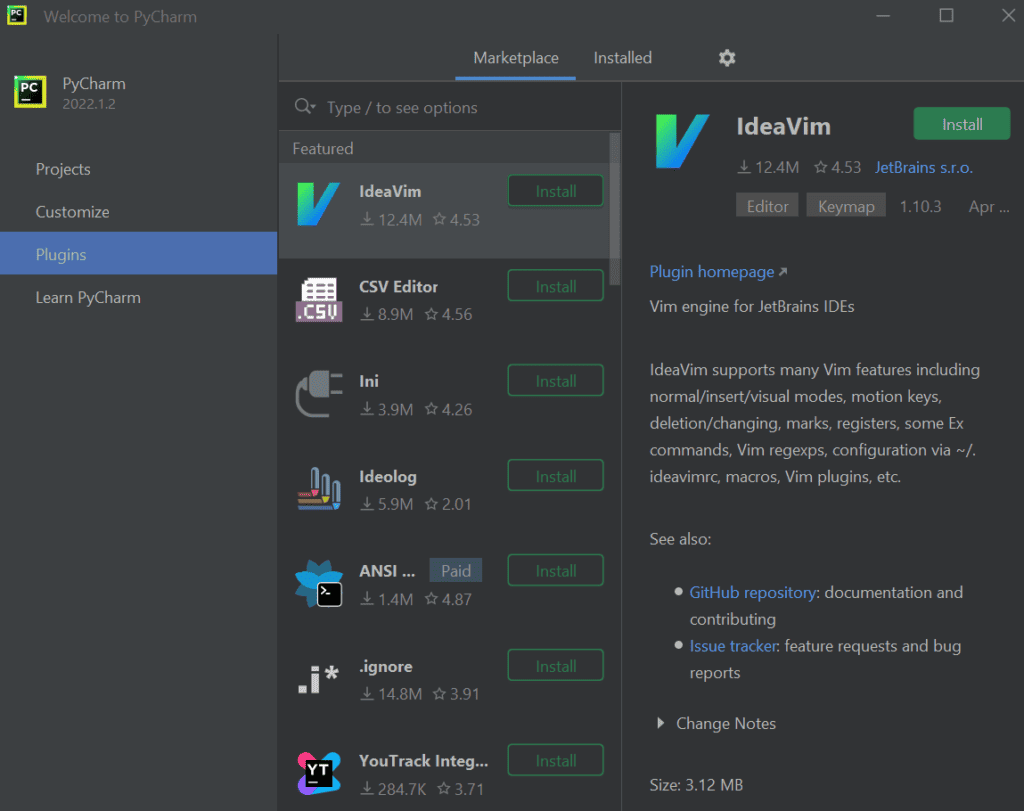
- Go to Marketplace and Search for “GitHub Copilot.”
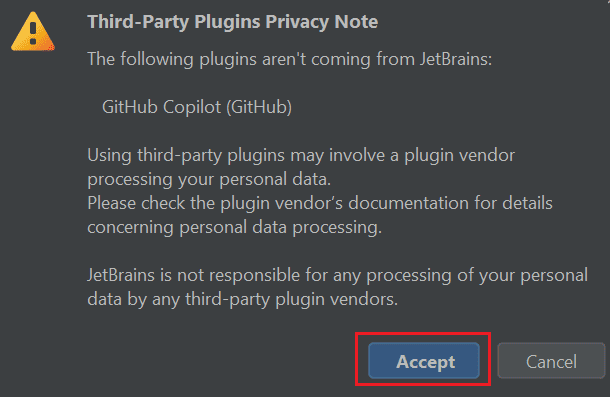
- Click on Install and select “Accept” for the third-party plugin note.
- Now restart PyCharm after it completes downloading.
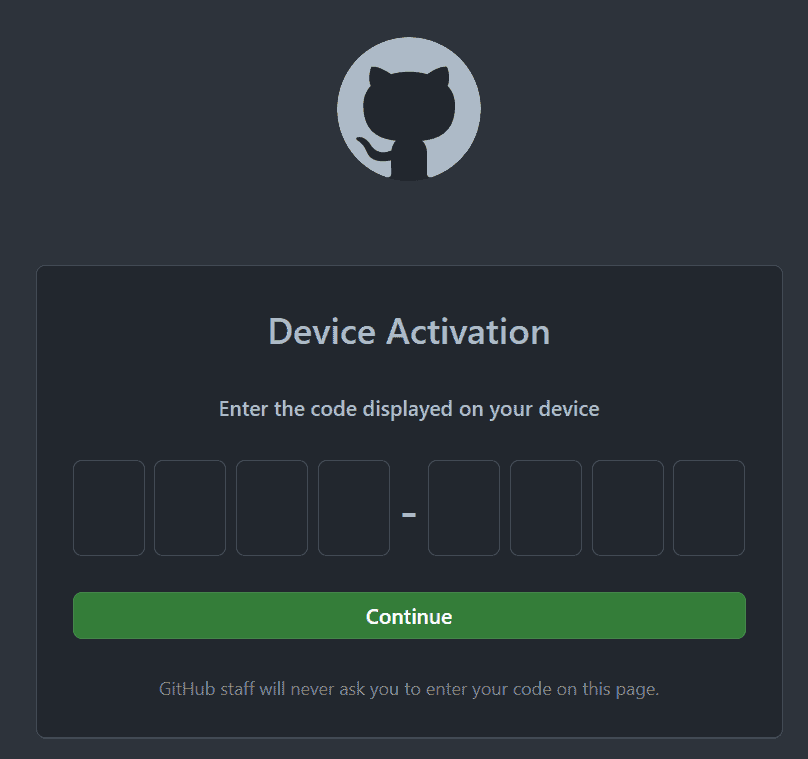
- Then go to Tools, select GitHub Copilot and Log in to GitHub.

- Sign in to GitHub by clicking on “Copy and Open.”

- Activate GitHub Copilot by pasting the code and clicking continue.
- GitHub will request the necessary permissions; click Authorize GitHub Copilot Plugin.
Note: When you grant access, you allow the plugin to access your private information, like repositories and email addresses.
- Add a billing method, and you will be good to go.
Thus, you can use GitHub Copilot in the PyCharm IDE as an extension.
Using GitHub Copilot In PyCharm
After installing GitHub Copilot in PyCharm, you can now use it as an extension for your projects. Furthermore, there are two ways to receive suggestions from GitHub Copilot on your IDEs. The first way is to start writing the code, and it will automatically suggest the following codes.
Here is an example of GitHub Copilot suggesting codes in a program to find the greatest common divisor.

Another way is to write comments describing what you want the code to do in a natural language. Here is an example of GitHub Copilot suggesting code after writing what to do in the comments.

Furthermore, you can use some shortcuts while using GitHub Copilot on your IDEs. These shortcuts can make your work easier and increase your productivity.
| Action | Windows/Linux | macOS |
|---|---|---|
| Trigger Inline Suggestions | Alt + | Option + |
| Next Suggestion | Alt + ] | Option + ] |
| Previous Suggestion | Alt + [ | Option + [ |
| Accept Suggestion | Tab | Tab |
| Dismiss Inline Suggestion | Esc | Esc |
| Show All Suggestion in New Tab | Alt + Enter | Alt + Enter |
Enabling And Disabling GitHub Copilot
You can enable or disable the GitHub Copilot extension specifically for individual or all languages.
The status icon in the bottom panel of your IDEs indicates whether the GitHub Copilot is enabled or disabled.
- To enable, click on the status icon in the bottom-right corner of the PyCharm.
Occasionally, the auto-complete suggestions can disturb you while you are focused. In addition, when you grant access to the plugin in the installation part, your private information is exposed.
Therefore, you can disable the GitHub Copilot plugin from your IDEs.
- You can disable it by clicking the status icon and disabling it for specific or all languages.

The Bottom Line
GitHub Copilot is an excellent AI assistant that helps you suggest codes with greater precision. Furthermore, it is easy to install on different IDE platforms, and you can also enable the GitHub plugin for specific programming languages.
However, you must pay subscription fees to access it, as it does not provide any free trials.
Read on to learn about the similarities & differences between Codex Vs. ChatGPT and the top alternatives of Codex.


5 thoughts on “How To Install GitHub Copilot In PyCharm?”